Restringing a tennis racquet means cutting out the old string bed and installing a new one, mains first and crosses second, following the frame's stringing pattern at a tension you choose. You can pay a shop to do it or learn to do it yourself; either way, the job follows the same workflow, and knowing that workflow helps you judge the result.
This guide covers when a restring is the right fix, how to decide between a shop and your own machine, what happens at each stage of a string job, and which tools you need. Tension, string choice and stringing methods each have their own guide, linked where they come up.
Key points
- Restring when the strings have worn out; re-evaluate the setup when fresh strings still do not feel right.
- A good shop gives you experience and a calibrated machine; stringing yourself gives you control and repeatability.
- Every job follows the same order: check the pattern, mount, mains, crosses, tie-offs, final check.
- The racquet manufacturer's stringing instructions are the reference for pattern, start holes and tie-off holes.
- Write down what you used each time, so a good result can be repeated.
Restring or re-evaluate?
Not every problem with a racquet is solved by putting the same strings back in. It helps to separate two situations.
When a restring is the answer
If the racquet felt right when it was freshly strung and has drifted since, the strings are the likely cause. A string that has broken, frayed or notched badly, or a string bed that no longer holds its shape, is a clear signal. So is a gradual change in feel compared with how the same setup played when new. Our guide to how long tennis strings last covers these signs and how playing frequency and string type affect timing.
When the setup itself needs a rethink
If a fresh string job still feels wrong, restringing with the same recipe will only reproduce the problem. Typical signs are discomfort in the arm, a ball that consistently flies long or short, or a string that breaks much sooner than you expected. In that case, change one variable at the next restring rather than several at once:
- Tension: start from the range printed on the frame and move in small steps. See the tennis string tension guide.
- String material or construction: see the tennis strings guide.
- Gauge: see the string gauge guide.
- Method, such as a hybrid or two-piece job: see stringing methods explained.
A new racquet is a special case. Factory strings are fine to play with, but they are rarely the string and tension you would choose, so many players restring a new frame with their usual setup to keep it consistent with the rest of their bag.
Doing it yourself or using a shop

Both routes can produce an excellent string job. The question is which trade-offs suit how often you play and how much you care about repeating the same result.
What a good shop gives you
- A stringer who has seen many frames and string types and can spot problems such as cracked grommets.
- No equipment to buy, store or learn.
- Advice on string and tension if you are still finding your setup.
The drawbacks are turnaround time, availability when you travel, and variation if different people or machines handle your racquet. If you use a shop, ask whether the machine is checked regularly and try to stay with the same stringer. Credentials such as the USRSA Certified Stringer and Master Racquet Technician programmes, which test stringing, frame inspection and mounting, are one way to judge a shop.
What stringing your own gives you
- Control over every variable, including when the job is done.
- The same machine and the same routine every time, which makes changes easier to evaluate.
- Freedom to experiment, one variable at a time.
The cost is the learning curve and the equipment. Expect your first few jobs to be slow. Speed comes with repetition, and accuracy comes from following the same routine.
The restringing workflow
The sequence below is the same on any machine. Exact clamp positions, mounting steps and tension settings depend on the machine, so use the machine-specific walkthroughs for those: the CybeX guide and the Platinum 3.0 guide, both with video. HEAD's step-by-step with tour stringer Richard Parnell, How to string a tennis racquet, is a useful independent reference for the same sequence.
1. Look up the pattern and check the string
Find the manufacturer's stringing instructions for your exact model. They give the pattern (for example 16 mains by 19 crosses), the holes where the mains start and are tied off, any holes to skip, string length, and the recommended tension range. HEAD's guide makes the same point before any string goes in: check the racquet, the pattern and the tension first. Run the new string through your hands to feel for flaws, which matters most with natural gut.
2. Remove the old strings and inspect the frame
Cut the old strings out in a balanced way rather than snipping at one edge, so the load comes off the frame evenly. Many stringers cut from the centre outwards. With the strings out, check the grommets and bumper guard for splits or wear, and the frame for cracks. Replace damaged grommets before restringing, because a split or sharp grommet can damage the new string.
3. Mount the racquet
The racquet must be held firmly and evenly so it keeps its shape while the mains pull the frame inwards. Follow your machine's mounting sequence exactly. When the job is finished, the racquet should come off the mount as easily as it went on, a sign that the frame has kept its shape.
4. String the mains
Mains are the strings that run from head to throat. They are installed from the centre outwards, alternating sides so the load on the frame stays symmetrical. Each string is tensioned, then clamped before the next is pulled. Clamps should grip the string without crushing it, and should match the string's gauge.
5. Weave and tension the crosses
Crosses run side to side and are woven over and under the mains. Weave each cross before tensioning it, keep the weave alternating correctly from one cross to the next, and keep each string as straight as possible. The last crosses near the throat are the tightest to weave and take the most patience.
6. Tie off
Mains and crosses finish with knots at the tie-off holes listed in the pattern. A starting clamp outside the frame holds tension while you tie, so less is lost at the knot. Tie neat, compact knots and trim the tails short; a consistent knot is part of a consistent string job.
7. Straighten and check
Straighten the strings so the spacing is even, check the weave for any skipped string, and look along the frame to make sure it has kept its shape. Then write the job down.
Tools you need

A basic stringing kit is short:
- Stringing machine and mounting system. Holds the frame and pulls each string to tension. The stringing machine comparison explains the main types.
- Clamps. Hold each string at tension while you pull the next.
- Starting clamp. Holds tension outside the frame on the first cross and at tie-offs.
- Awl. Opens a crowded grommet hole and helps guide string through it without forcing.
- Pliers and cutters. For pulling string through tight holes, tightening knots and trimming tails.
Add the manufacturer's stringing instructions for each racquet you string and a notebook or phone note for your records.
Keep a stringing record
The single habit that makes restringing useful rather than routine is keeping a record. For each job, note the date, racquet, string and gauge, tension for mains and crosses, method (one-piece, two-piece or hybrid) and the machine used. Add a line after you have played on it. When a job feels right, you can reproduce it; when it does not, you know exactly what to change next.
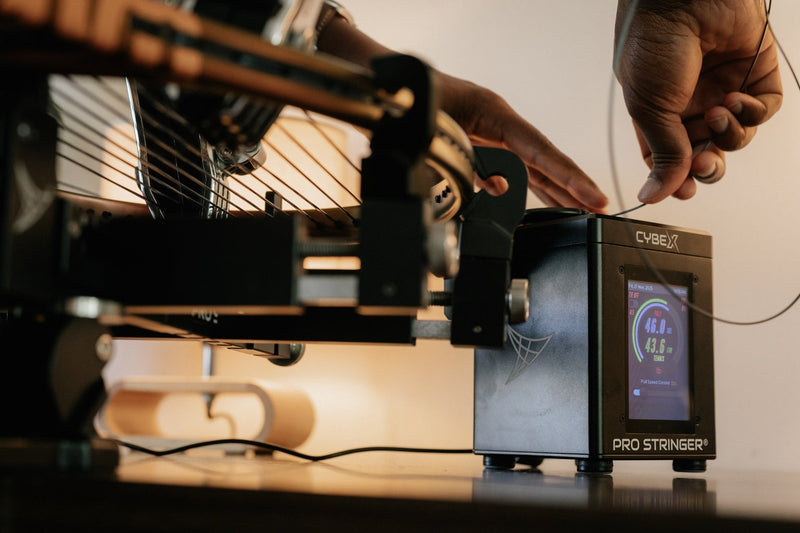
This is also where a machine that repeats the same pull every time earns its keep. Pro Stringer's CybeX is a digital, touchscreen machine that strings tennis, badminton and squash on one unit, so a player or coach who strings for more than one sport can keep a single routine.
Frequently asked questions
How long does it take to learn to string a racquet?
Most people can complete a first string job by working slowly through a guide, but expect the early jobs to take much longer than later ones. Doing the same steps in the same order each time is what builds both speed and consistency.
Can I restring a racquet if only one string has broken?
Restring the whole bed. Cut out the remaining strings evenly so the frame is unloaded in a balanced way, then install a full new set.
Do I need different equipment for badminton or squash?
The workflow is the same, but tension ranges, clamps and mounting differ by sport. Pro Stringer's Platinum 3.0 is sold as separate tennis, badminton and squash models, while the CybeX covers all three. The FAQ has the details.